the underrated levels of capture one
As of this 2024 Spring semester at Santa Monica College, “Capture One” has been the image editing software I’ve been learning to utilize and appreciate. In my opinion, of all the tools available in the software, the Levels tool is the most underrated feature. When in RGB selection tab, it helps to edit the tonal range values of the photo in relation to the histogram and your desired creative contrast. This tool allows for more control of your contrast in comparison to the specific contrast slider.
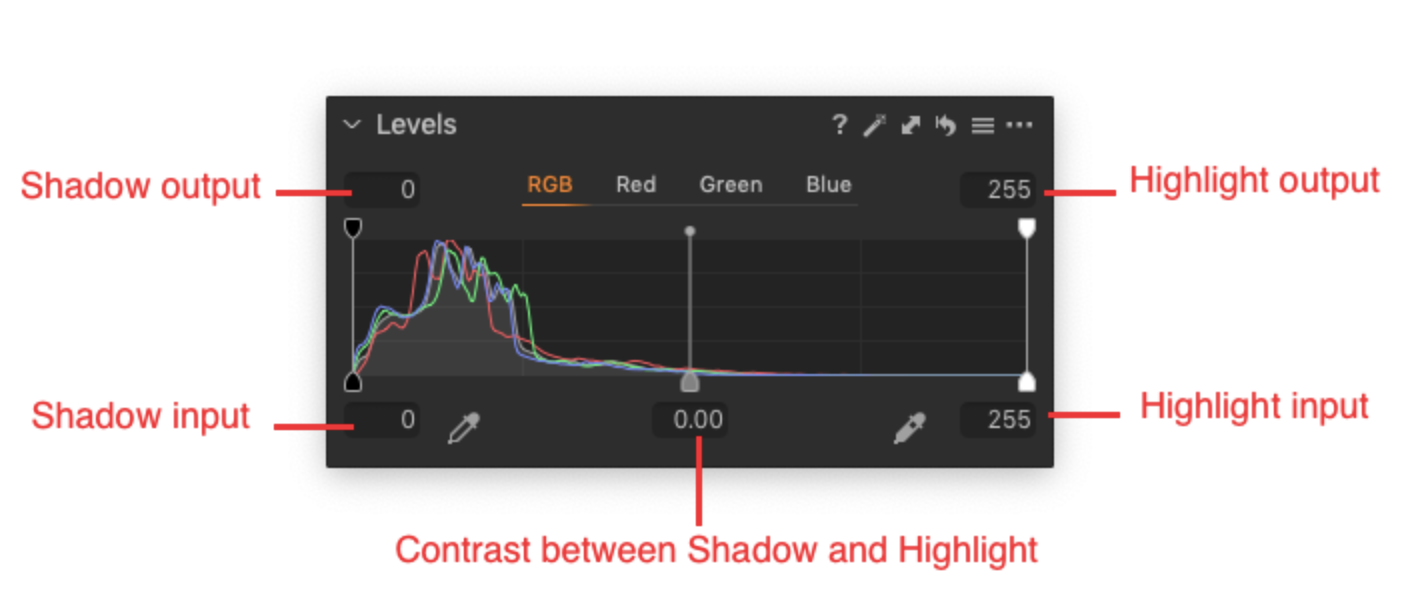
Shadow Input and Highlight Input
To help adjust for your base contrast, simply sliding the Shadow input and Highlight input inward. you’ll notice a significant adjustment in your contrast.
Contrast between Shadow and Highlight (Middle slider)
The brightness of the mid-tones can be adjusted via the middle-slider.
If you move the slider to the left, the highlights compress and shadows lighten.
If you move the slider to the right, the shadows compress and highlights lighten.
Note: while avoiding color shifts, the RGB selection will not correct color imbalances.
Levels using individual Red, Green, and Blue
The color balance of the photo can be adjusted. If a color shift happens to be apparent, you are able to adjust the Levels of the specific Red, Green, or Blue selection tab.
Auto Levels
Personally, I haven’t utilized the Auto Levels selection. It is available as an option in the top right tool bar. To my understanding, the auto feature is specific to each tab individually. The RGB selection tab will affect the shadow and highlight sliders by increasing the highlights and changing the brightness. As for each color tab, the auto Levels will adjust to a “realistic-looking result”.
Reference: https://support.captureone.com/hc/en-us/articles/360002602797-The-Levels-tool-overview